Drum EQ Guide
Here is your Free EQ Guide. Your Drum Tuning & Mic Placement Blueprint has been sent to your email. Please check all folders and give it 10 minutes.
Drum EQ doesn't have to be hard...
Once you understand the role each drum plays in your mix, it becomes more about subtle shaping than drastic changes. Kick, snare, and toms all have predictable frequency ranges, so with a bit of practice, you’ll start to recognize what needs a boost or cut. Think of EQ as a sculpting tool, not a fix-it-all, you’re just cleaning up muddiness, enhancing clarity, and making space for each element to breathe. With a few go-to moves and some critical listening, EQing drums can feel intuitive and even fun.
Before we start.
The EQ guidelines I’m sharing are simply what I’ve found works best for me through years of trial and error. They’re not hard rules, think of them more as a starting point. I encourage you to tweak, experiment, and trust your ears as you go. I’ll be walking you through the fundamentals of drum EQ, along with real examples pulled straight from my own mixes. These techniques work great for my style and gear, but they might sound different on your end, so feel free to tweak them on your own and use them as a starting point.


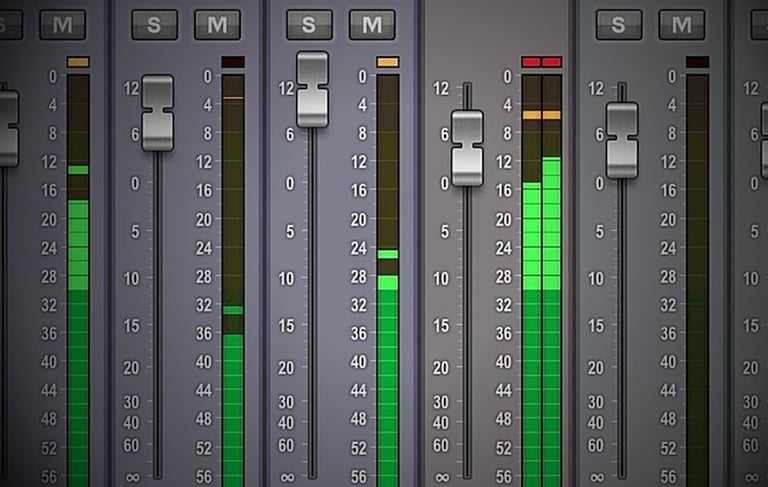
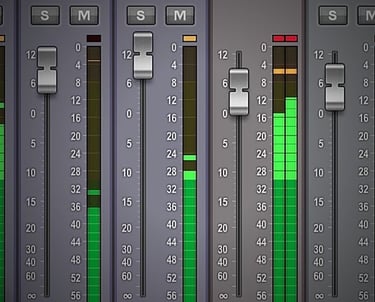
Gain Staging
Gain staging is the process of setting proper input levels at every stage of your recording and mixing chain to ensure clean, balanced audio without unwanted distortion or noise. In drum recording, it’s especially important because drums have a wide dynamic range, and clipping or overly quiet signals can ruin a good take. Proper gain staging helps keep your tracks punchy, clear, and gives you more headroom to work with in the mix. To gain stage perfectly before mixing, start by setting your mic preamp levels so the loudest hits peak around -10dB to -6dB on your DAW’s meters. This leaves enough headroom for processing while keeping the signal strong and clean.
HOW TO EQ EACH DRUM TRACK
1. Snare EQ
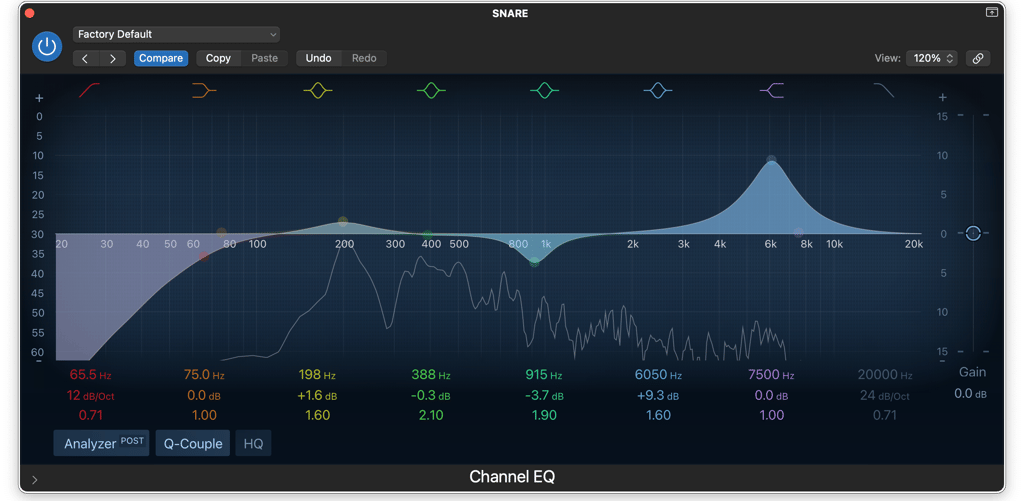
Snare EQ can really bring your snare to life, making it punch through the mix without sounding harsh or boxy. The goal is to shape the snare so it complements your kit and your song's vibe. Every snare is different depending on tuning, mic placement, and your room, but there are a few go-to frequency zones that tend to deliver great results. Here’s a quick breakdown of how to EQ a snare and what to listen for:
Snare EQ Tips – Key Frequency Spots:
Low Cut (~80–100 Hz):
Roll off unnecessary low-end rumble to clean up the bottom.Body (150–250 Hz):
Boost here if the snare sounds too thin and you want more weight or "thump."Boxiness (400–800 Hz):
Cut gently in this area to reduce a hollow or cardboard-like sound.Snap/Attack (1–2 kHz):
Boost slightly to help the snare cut through the mix and add definition.Crack/Presence (3–5 kHz):
Enhance this range if you want more bite and stick definition.Air/Top End (7–10 kHz):
Add a touch here for brightness and shimmer, but don’t overdo it.
Start subtle, use your ears, and always EQ in context with the full kit or mix, what sounds good solo might not sit well in the mix.

2. Kick EQ
Kick drum EQ is all about finding the balance between low-end power and midrange punch. A well-EQ’d kick should anchor your mix, giving the track that deep, solid foundation without sounding muddy or overpowering. The exact settings will depend on your mic, drum, and genre, but there are common frequency zones that can help guide your tweaks. Here’s a breakdown of how to EQ a kick and what to listen for:
Kick EQ Tips – Key Frequency Spots:
Sub/Boom (40–60 Hz):
Boost here for that deep, chest-hitting low end, great for modern or heavy genres.Thump/Body (80–100 Hz):
Emphasize this range for a fuller, rounder kick that feels solid without being too boomy.Muddiness (200–300 Hz):
Cut gently here to clean up low-mid buildup that can cloud your mix.Attack/Punch (2–4 kHz):
Boost this range to bring out the beater click or snap for better presence in the mix.Air/Click (5–7 kHz):
Add a subtle boost here if the kick needs a little more top-end definition.
As always, make small moves and listen in the context of the full mix. Soloing is helpful for identifying problem areas, but the real test is how the kick interacts with the bass and rest of the drums.

3. Tom EQ
Tom EQ helps give your toms that powerful, clean, and spacious sound that cuts through without getting muddy. While each tom, rack, floor, or otherwise, will need slightly different EQ settings due to size and tuning, the core concepts stay the same. You’re aiming to bring out the depth and impact while keeping resonance and boom under control. Here's a breakdown of how to EQ toms and the key frequency spots to watch:
Tom EQ Tips – Key Frequency Spots:
Low End/Power (60–100 Hz):
Boost here for that deep, punchy impact, lower for floor toms, slightly higher for rack toms.Body/Fullness (100–200 Hz):
Enhance this range to give your toms more weight and fullness in the mix.Boxiness (300–500 Hz):
Cut gently to reduce that “cardboard” or boxy tone that can clutter your mix.Attack/Stick Definition (3–5 kHz):
Boost slightly to help the attack of the stick cut through and give the toms presence.Ringing/Overtones (6–8 kHz):
Cut or control this range if the toms are ringing too much or sound harsh.
EQ each tom individually, but use these zones as your foundation. The idea is to enhance the unique tone of each drum while still making them feel like part of the same kit. Always listen in context with the rest of your mix.

4. Overhead EQ
Overhead EQ is all about capturing the full picture of your kit while controlling harshness and enhancing clarity. Overheads aren't just cymbal mics, they pick up a lot of the overall kit, especially the stereo image and ambiance. The EQ approach will depend on your drum mix goals, but the fundamentals stay consistent whether you’re going for a clean, natural sound or a tighter, more processed feel. Here's how to EQ your overheads and the key frequency zones to focus on:
Overhead EQ Tips – Key Frequency Spots:
Low Cut (Below 100–150 Hz):
Roll off the low end to remove kick drum rumble and low-frequency buildup. Let close mics handle the low-end punch.Low Mids (200–500 Hz):
Cut gently here to reduce muddiness or boxiness that can cloud the overall kit sound.Presence (3–5 kHz):
Boost slightly to bring out the snap of snare and definition of cymbals, but watch for harshness.Air/Brilliance (8–12 kHz):
Add a touch here to give the cymbals shimmer and brightness without making them too piercing.Harshness (5–7 kHz):
Cut slightly if cymbals sound too aggressive or metallic, smooths out brittle tones.
Use EQ to shape overheads based on what role they play in your mix, if they’re your main kit mics, go lighter on the cuts. If they’re mostly for cymbals and ambience, more surgical EQ can help make room for your close mics. Always A/B with and without EQ to keep your ears honest.

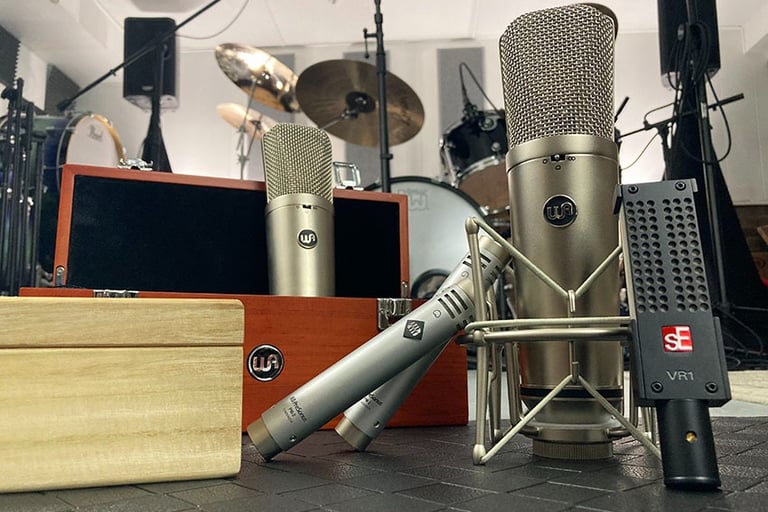
ACCESSORY MICROPHONES
5. Room Mics
Room mic EQ is all about shaping the space and vibe your drums live in. Room mics capture the natural reverb, depth, and energy of your kit, adding size and realism to the overall drum sound. Depending on how much room tone you want, you can either go subtle or let them breathe big and wide in the mix. While every room and mic placement is different, the EQ principles stay consistent. Here’s how to EQ room mics and what frequencies to focus on:
Room Mic EQ Tips – Key Frequency Spots:
Low Cut (Below 60–100 Hz):
Roll off unnecessary low-end rumble or bleed from the kick unless you want a super roomy, boomy vibe.Low Mids (150–300 Hz):
Cut gently to reduce muddiness or “woofiness” that can mask clarity and make the room sound boxy.Body/Impact (300–600 Hz):
Boost slightly if the drums feel too thin or distant, adds a bit of warmth and presence.Snare Crack/Presence (2–5 kHz):
Enhance this range if the snare or toms feel too buried in the room sound.Air/Ambience (8–12 kHz):
Add a touch here for a more open, airy feel, especially useful for bringing out cymbals and room detail.
EQ your room mics based on how “big” or “tight” you want your drums to feel. If you want a dry, focused sound, high-pass more aggressively and compress heavily. For a live, natural feel, keep more of the low and top end and let the room speak. Always listen in context with the rest of the kit.

6. Snare Bottom Mic EQ
The snare bottom captures the crispness and sizzle of the snares. It’s usually blended in subtly but plays a key role in the overall snap.
High Pass (~100 Hz):
Remove low-end rumble and bleed from the kick.Snare Snap (4–6 kHz):
Boost here to enhance the crispness and definition of the snare wires.Harshness (6–8 kHz):
Cut slightly if it sounds too fizzy or brittle.
7. Ride Mic EQ
The ride mic helps bring clarity and detail to ride patterns, especially in jazz, rock, or intricate grooves.
High Pass (~150 Hz):
Clean up low-end bleed from the rest of the kit.Stick Definition (3–5 kHz):
Boost for more articulation and “ping” from the ride.Air/Shimmer (10–12 kHz):
Add a bit here for sparkle and openness, but keep it smooth.
8. Hi-Hat Mic EQ
Hi-hat mics add sharpness and precision to the groove but can get harsh quickly, so EQ with care.
High Pass (~200 Hz):
Cut out low-end bleed from the snare and kick.Definition (4–6 kHz):
Boost slightly for clarity and articulation in patterns.Harshness (6–8 kHz):
Dip a bit if the hat sounds too sharp or piercing.Air (10–12 kHz):
Optional boost for sparkle and sheen, depending on the mix.
Each of these mics plays a supportive role, so always EQ them with the full kit in mind, they’re usually not meant to stand out, but to enhance precision and clarity in the mix.
BONUS TIPS FOR A BETTER MIX
9. Cleaning up your mix
Cleaning up your mix isn’t about doing more, it’s often about doing less in a smart way. A cluttered mix usually comes from too much low-end buildup, washed-out effects, or stereo chaos in the sub frequencies. The good news is, with just a few intentional moves, you can instantly make your drums (and entire mix) sound tighter, cleaner, and more professional. Here are three simple but powerful ways to clean up your mix:
3 Ways to Clean Up Your Drum Mix:
High-Pass Filter on Unneeded Tracks:
Roll off the low end (usually below 80–120 Hz) on tracks that don’t need it, like overheads, hi-hats, snare bottom etc. This clears out space for your kick and bass to breathe without fighting buried low-frequency noise.Send Reverb to a Separate Bus:
Instead of slapping reverb directly on each track, send them to a reverb bus. This gives you more control over EQ, compression, and volume of the reverb itself, making your mix sound spacious without getting messy or muddy.Mono All Low-End Below 50 Hz:
Use a stereo imager or EQ plugin to collapse everything under 50 Hz to mono. This keeps the sub-frequencies tight, focused, and centered, preventing a “blurry” low end and giving your kick and bass more punch.
These moves may seem small, but when combined, they create a much clearer, more defined mix that gives every drum, and every instrument, its own space.

10. Thicken your Snare
If your snare drum is feeling thin or lacks presence in the mix, a simple EQ move can bring it back to life. Sometimes snares get lost because they’re all snap and no body, but boosting the right low-mid frequencies can add that warm, punchy foundation that makes the snare feel full and solid. Here’s a quick tip to get more thump and thickness out of your snare:
Quick Tip – Add Body to Your Snare:
Boost Around 150–250 Hz:
This is the sweet spot for snare body. A small, wide boost here can add warmth, low-end punch, and that satisfying “boom” that fills out the center of your mix.
Be gentle with the gain, start with +2 to +4 dB and adjust by ear. Too much can make the snare muddy, but just enough will make it hit harder and feel more substantial, especially in rock or hip-hop mixes.

11. Drum Bus EQ move
Your drum bus is the glue that holds your entire kit together, and a subtle EQ move here can make a big impact. One of the easiest ways to add punch and clarity to your whole drum mix is by gently shaping the low and high ends right on the bus. This adds energy and excitement without over-processing individual tracks. Here’s a quick tip to enhance your drum bus:
Quick Tip – Drum Bus EQ for Punch & Presence:
Slight Boost in the Lows (~30–80 Hz) and Highs (~8–20 kHz):
A gentle low-end boost gives the kick and toms more weight, while a high-end lift adds sparkle and air to snares and cymbals. Together, this creates a more polished, punchy, and lively drum sound.
Keep it subtle, +1 to +3 dB is often enough. Think of it as putting a nice finishing touch on the entire kit, giving it extra presence and lift in the mix.

Conclusion
We’ve covered a solid foundation for EQing your drums, from dialing in each individual mic like kick, snare, toms, and overheads, to shaping your room mics and fine-tuning your drum bus for that extra punch. You’ve also got some quick cleanup tips and EQ tricks to help tighten up your mix and make everything sit better together. Whether you're working with live drums or samples, these techniques are designed to give you control, clarity, and impact across your entire kit.
You are ready for a pro drum mix!
Thank you so much for checking out this guide, I genuinely appreciate you taking the time to dive into your drum mixes with me. I’m always glad to help and share what I’ve learned over the years, and I truly believe that even a few of these EQ moves can make a massive difference in the clarity, punch, and vibe of your drums. Remember, mixing is a journey, and the more you experiment and trust your ears, the better you’ll get. Keep grinding, stay creative, and as always, if you need more help, I’ve got you. Let’s make those drums slam!

Logic Pro Drum Mix Template
If you want to take things a step deeper, I put together a $47 Drum Mix Template that pairs perfectly with what you just learned.
It gives you:
my full drum mix chain already laid out
EQ + compression starting points
routing + buses exactly how I structure them
the same workflow I use to make cheap kits sound expensive
a plug-and-play template you can load up and have a mix ready sound instantly
If the EQ guide gave you clarity, the template gives you the actual workflow so you don’t have to guess what to do next or build everything from scratch.
It’s super affordable and honestly saves people a ton of time.
You can grab it here if you want to level up your mixes: [link]
Let me know how your next mix turns out 🔥